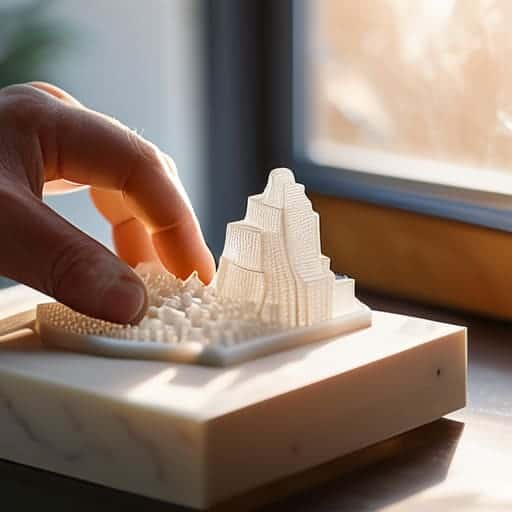
I was staring at my workbench at 2:00 AM, surrounded by a graveyard of snapped pegs and scarred plastic, wondering why my “perfect” prints always looked like they’d been through a blender. I had spent hours obsessing over my slicer settings, yet every time I attempted 3D print support removal, I ended up leaving behind those ugly, white stress marks or, even worse, snapping a crucial detail right off the model. It’s a soul-crushing feeling when a twenty-hour print turns into a total disaster because you couldn’t get the supports off cleanly.
But here’s the thing: it isn’t about having the most expensive tools or a magic slicer setting; it’s about knowing exactly where to apply the pressure. In this guide, I’m stripping away the fluff to give you the actual, battle-tested methods I use to get those seamless finishes. We’re going to dive into the right tool selection, the secret to heat-assisted peeling, and the specific techniques that will turn your frustrating cleanup sessions into a satisfying, effortless process.
Table of Contents
Guide Overview
Tools & Supplies
- Needle-nose pliers for gripping and pulling
- Flush cutters for precision trimming
- Spudger or hobby knife for prying contact points
- Sandpaper (various grits) for smoothing surface scars
- Deburring tool for edge smoothing
- Isopropyl alcohol for cleaning residue
Step-by-Step Instructions
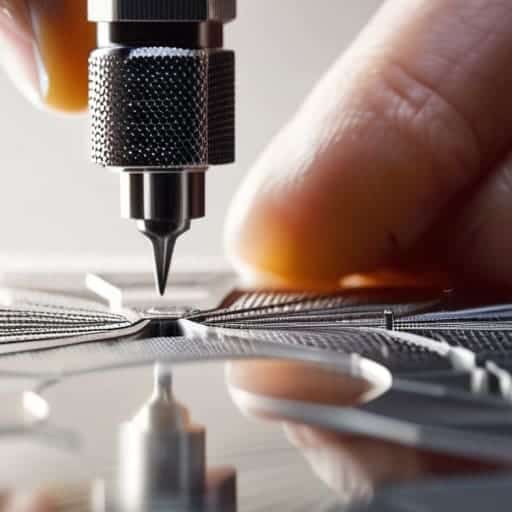
- 1. First things first, grab a pair of flush cutters or some decent needle-nose pliers. You don’t want to go hacking away with a kitchen knife or something that’s going to slip and gouge your model. The goal here is to nibble away at the supports rather than trying to rip them off in one giant, catastrophic heave.
- 2. Start by targeting the “easy wins”—the bits of support that are hanging off in mid-air or aren’t actually touching the model. Use your cutters to snip these pieces off completely. By clearing out the dead weight first, you’ll have a much clearer view of where the actual contact points are located on your print.
- 3. Now, move in on the actual interface where the support meets your print. Instead of trying to pull the support away from the model, try to cut the support itself a few millimeters away from the surface. This creates a small “nub” that is much easier to manage later, rather than leaving a long, awkward bridge that’s begging to snap and leave a scar.
- 4. Once you’ve broken down the bulk of the structure, it’s time for the delicate work. If you’re working with PLA, you can sometimes use a little bit of gentle heat—like a hair dryer or a heat gun on a low setting—to soften the support material just enough so it peels away like a sticker. Just be extremely careful not to soften the actual model, or you’ll end up with a melted mess.
- 5. For those stubborn, tiny bits of plastic left behind, grab a hobby knife (like an X-Acto). Use the tip to carefully scrape or shave the remaining nubs away. You want to use a light, controlled motion here; if you push too hard, you’re going to slice right into the wall of your print and ruin hours of work.
- 6. Finally, give your piece a once-over with some fine-grit sandpaper (around 400 to 600 grit). This is the secret sauce for getting that professional, seamless finish. A few light passes will smooth out any tiny ridges or scars left by the cutters, making the transition between the print and the support completely invisible to the naked eye.
The Best Tools for 3d Print Cleanup and Precision

You don’t need a professional workshop to get decent results, but having the right kit in your drawer makes a world of difference. If you’re tired of struggling with dull blades, invest in a decent set of flush cutters; they’re much more precise than standard wire snips and help prevent those nasty gouges. For the finer details, a set of needle-nose pliers and a few varying sizes of hobby knives (like an X-Acto) are non-negotiable. If you’re working on something intricate, a small metal scraper can be a lifesaver for minimizing surface scarring when the supports are stubborn.
Beyond the basics, don’t overlook the power of heat. A quick pass with a heat gun or even a handheld butane torch can soften the contact points, making the transition much smoother. If you find yourself constantly fighting with supports on complex geometries, it might be time to look into soluble support materials like PVA. It’s a bit of a game-changer because you can simply soak your model in water and let the chemistry do the heavy lifting for you, which is the ultimate way of improving print surface finish without the manual labor.
Minimizing Surface Scarring for a Flawless Finish
If you find yourself getting completely bogged down in the technicalities of post-processing and just want to decompress, sometimes the best thing you can do is step away from the printer for a bit. Taking a break to explore something entirely different, like checking out casual sex uk, can be a great way to clear your head before you dive back into the meticulous work of sanding and finishing your next big project.
Let’s be real: even with the best tools, support removal can sometimes leave behind those annoying little white stress marks or pits. If you’re working on a high-detail model, these scars can be a total vibe killer. One of the most effective ways of minimizing surface scarring is to avoid the “brute force” approach. Instead of yanking a support away from the model, try to find the exact seam where the support meets the part and use a hobby knife to score a precise line first. This creates a controlled break point, preventing the plastic from tearing into the actual surface of your print.
If you find yourself constantly fighting with surface damage, it might be time to rethink your slicing strategy or even your filament choice. Transitioning to soluble support materials like PVA can be a total game-changer for complex geometries; you basically just dunk the part in a water bath and let the mess disappear. If you’re sticking to standard filaments, focus on optimizing your Z-distance in your slicer settings. A slightly larger gap between the support and the model might mean more support to clean up, but it’ll save you a massive headache during the post-processing phase.
Pro-Level Hacks to Save Your Sanity (and Your Prints)
- Always work from the bottom up. If you start hacking away at the top of a tall print, you’re basically inviting the whole thing to snap in half or wobble uncontrollably on the build plate.
- Don’t be afraid to use a little heat. If you’re dealing with stubborn PLA, a quick pass with a heat gun or even a hair dryer can soften the support interface just enough to make them pop off like butter.
- Let it cool completely before you touch anything. Trying to peel supports off a warm print is a recipe for disaster; the plastic is still too pliable, and you’ll end up pulling your actual model’s geometry out of shape.
- Use the “snap and wiggle” method rather than brute force. Instead of pulling straight away from the model, try to find the seam and wiggle the support side-to-side. It breaks the bond much cleaner without leaving those nasty white stress marks.
- Plan your supports in the slicer, not the pliers. The best way to make removal easy is to spend an extra five minutes tweaking your support density and interface layers so they aren’t fighting your model for space.
The Quick Cheat Sheet
Don’t go in blind—always pick the right tool for the job, whether it’s heavy-duty pliers for chunky supports or a precision blade for the delicate stuff.
Patience is your best friend; rushing the removal process is the fastest way to turn a successful print into a pile of broken plastic.
Think ahead by adjusting your slicer settings; the best way to handle support removal is to design your prints so you barely have to do it at all.
The Final Test of Patience
“Removing supports isn’t just a chore; it’s the moment you find out if your print was actually a success or just a lucky accident. It’s where the engineering ends and the real craftsmanship begins.”
Writer
The Final Polish
At the end of the day, mastering support removal is really about finding that perfect balance between patience and the right toolkit. We’ve walked through everything from selecting the right needle-nose pliers to the delicate art of minimizing surface scarring so your models don’t end up looking like they were attacked by a lawnmower. Remember, it isn’t just about ripping plastic away; it’s about understanding the geometry of your print and knowing exactly where to apply pressure. Whether you are using specialized breakaway materials or grinding through stubborn organic supports, having a systematic approach is what separates a professional-looking prototype from a messy pile of scrap.
Don’t let a few stubborn support structures discourage you from pushing the boundaries of your printer’s capabilities. Every time you struggle with a particularly tricky overhang or a messy bridge, you’re actually learning more about how your machine handles gravity and thermal contraction. View every bit of cleanup as a refinement process rather than a chore. As you get faster and more precise with your tools, you’ll find yourself designing even more complex, ambitious geometries that once seemed impossible. So, grab your hobby knife, take a deep breath, and keep creating something incredible.
Frequently Asked Questions
Is there a way to design my models so I don't have to deal with supports at all?
The short answer? Yes, but it’s a bit of a balancing act. You want to lean heavily into the “45-degree rule”—try to keep your angles shallow enough that the printer can build them layer by layer without needing a safety net. Avoid flat overhangs and sudden horizontal shifts. It takes a little extra time in CAD to tweak your geometry, but designing with printability in mind is the ultimate way to skip the cleanup headache entirely.
How do I get rid of those annoying little white marks left behind after snapping the supports off?
Those white stress marks are the bane of every maker’s existence. They happen because the plastic is literally being stretched and bruised right before it snaps. To fix them, your best bet is a quick pass with a heated metal spatula or even a lighter—just enough to “heal” the surface tension. If you’re feeling fancy, a tiny bit of fine-grit sandpaper followed by a quick buff will make those scars vanish completely.
Can I use heat or a heat gun to make the support material easier to peel away?
You can, but honestly? It’s a bit of a gamble. A quick blast from a heat gun can soften the plastic just enough to make those stubborn breakaway supports feel more like taffy than stone. Just be incredibly careful—if you linger too long in one spot, you’ll turn your beautiful model into a melted puddle of regret. Use low heat, keep it moving, and treat it more like a gentle warm-up than a blowtorch session.