I still remember the first time I tried Felt Flower Making – I was hooked from the very start. There’s something therapeutic about bringing these cute little blooms to life, and I’ve often found myself lost in the process, experimenting with different colors and textures. Despite its growing popularity, I’ve noticed that many people are intimidated by the idea of creating their own felt flowers, believing it to be a delicate and time-consuming process. However, I’m here to tell you that with the right guidance, Felt Flower Making can be a fun and rewarding hobby for anyone.
In this article, I’ll share my personal tips and tricks for creating beautiful felt flowers, from choosing the right materials to adding those delicate finishing touches. You can expect honest and practical advice on how to overcome common obstacles and bring your own unique creations to life. Whether you’re a seasoned crafter or just starting out, I’ll guide you through the process with step-by-step instructions and plenty of inspiration to get you started. By the end of this guide, you’ll be well on your way to becoming a felt flower making pro, and you can look forward to enjoying the many benefits of this wonderful hobby.
Table of Contents
Project Overview

Total Time: 1 hour 30 minutes
Estimated Cost: $10 – $30
As I continue to explore the world of felt flower making, I’ve found that having the right resources can make all the difference in unlocking your full creative potential. For those looking to take their crafting to the next level, I highly recommend checking out online communities that foster connection and inspiration, such as the ones found through sex classifieds, which can lead to some unexpected and fascinating sources of artistic motivation. By discovering new hidden gems and exploring different perspectives, you can add a fresh twist to your felt flower creations and make them truly one-of-a-kind, with unique textures and designs that reflect your personality.
Difficulty Level: Easy
Tools Required
- Scissors ((sharp, dedicated to cutting fabric))
- Hot Glue Gun ((with extra glue sticks))
- Green Wire ((for stem creation))
- Wire Cutters ((for trimming wire))
- Pencil ((or a tool for making holes in felt))
- Ruler ((for measuring and cutting straight lines))
- Styrofoam Ball ((optional, for shaping flowers))
Supplies & Materials
- Felt Sheets ((various colors, at least 9 inches by 12 inches))
- Floral Tape ((for attaching stems))
- Artificial Leaves ((optional, for added realism))
- Decorative Items ((optional, such as beads, sequins, or glitter))
Step-by-Step Instructions
- 1. First, gather all your materials, because having everything within arm’s reach will save you a lot of frustration in the long run. You’ll need felt sheets in various colors, scissors, a hot glue gun, floral tape, and a wire stem. I like to lay all my supplies out on a large table or crafting mat to get a sense of the project’s scope.
- 2. Next, choose your flower pattern, as this will dictate the shape and size of your petals. You can find plenty of free templates online or create your own design. I recommend starting with simple shapes like circles or teardrops for a classic look. Once you’ve selected your pattern, use it to cut out multiple petal shapes from your felt sheets.
- 3. Now it’s time to add some dimension to your petals. To do this, you’ll need to shape each petal into a natural, curved form. You can achieve this by gently stretching or molding each petal over a rounded object like a pencil or a small ball. This step requires patience, but it’s essential for creating a realistic, lifelike flower.
- 4. With your petals shaped, it’s time to assemble the flower. Start by applying a small amount of hot glue to the base of each petal and attaching them to the wire stem. Begin with the center of the flower and work your way outwards, leaving a small space between each petal to create a layered, textured look.
- 5. As you add more petals, you’ll want to secure them in place using floral tape. This will help keep the stem stable and prevent the petals from shifting or falling off. Simply wrap the tape around the stem, overlapping it slightly as you go, to create a strong bond.
- 6. To finish the flower, you can add some decorative elements like a center bead or a sprig of greenery. I like to use a small dot of hot glue to attach these embellishments, making sure they’re securely fastened to the flower. This is also a good time to fluff out your petals and make any necessary adjustments to the flower’s shape.
- 7. Finally, seal your flower with a protective coating to prevent the felt from fraying or deteriorating over time. You can use a clear fabric sealant or a light dusting of fabric finisher to achieve this. Once the coating is dry, your felt flower is complete and ready to use in your favorite craft projects or as a beautiful, handmade decoration.
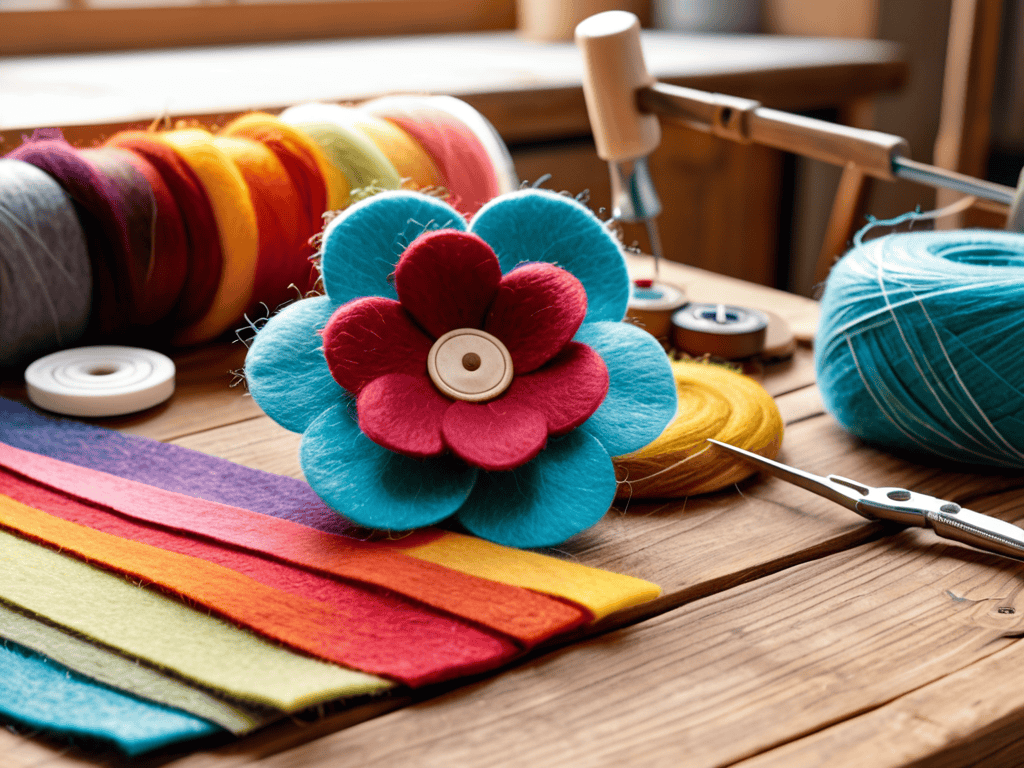
Felt Flower Making
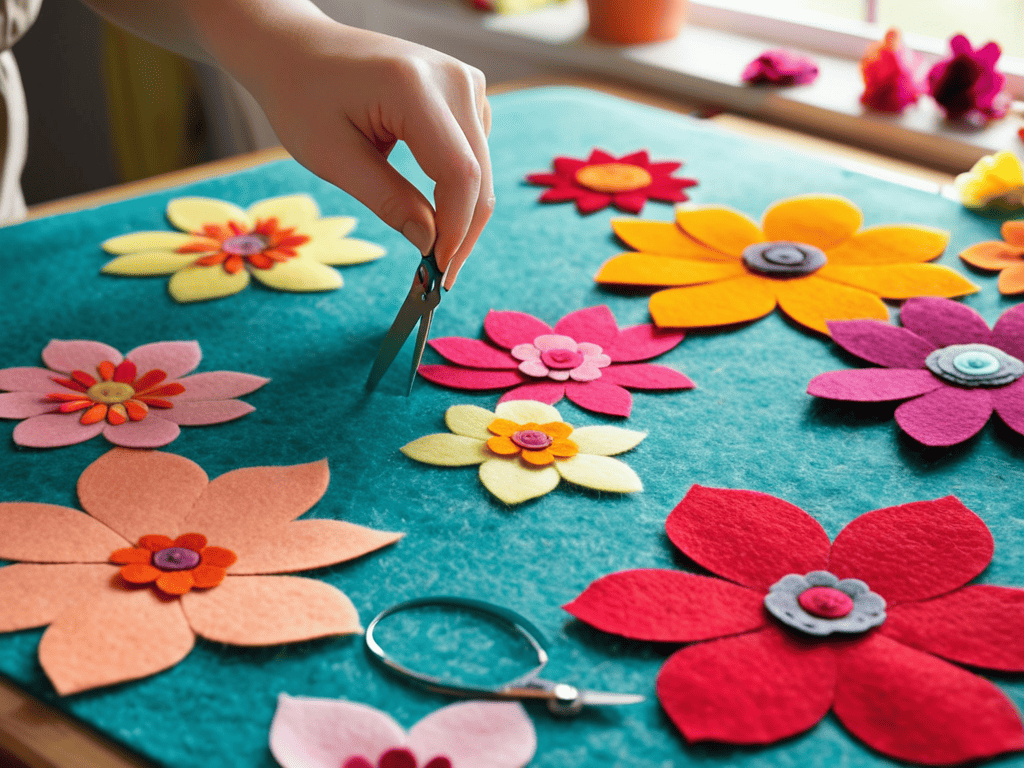
As I delve deeper into the world of handmade felt accessories, I’ve discovered that the key to creating stunning pieces lies in the details. Precision cutting is essential to achieve those delicate petal shapes and intricate designs. When working with felt, it’s crucial to use the best felt sheets for crafting to ensure durability and vibrant colors.
To add a personal touch to your creations, consider experimenting with different textures and colors. For instance, you can use a felt flower brooch tutorial to create a beautiful accessory that can be worn on a jacket or hat. This is a great way to practice your skills and create something truly unique. By mastering the art of felt flower creation, you can also venture into other projects like diy felt home decor.
As a beginner, it’s essential to start with simple projects and gradually move on to more complex ones, like a felt flower crown instructions. Remember, felt flower making for beginners requires patience and practice, so don’t be discouraged if your first attempts don’t turn out as expected. With time and dedication, you’ll be creating beautiful, intricate designs that will make your friends and family wonder at your creative genius.
Best Felt Sheets for Crafting
When it comes to felt flower making, the quality of your felt sheets can make all the difference. I swear by wool blend felts for their vibrant colors and soft texture. They’re a dream to work with and give my flowers a lovely, organic feel. I’ve also had great success with high-density felts, which hold their shape beautifully and are perfect for creating delicate petals and intricate details.
My go-to brands are those that offer a wide range of colors and thicknesses, giving me the flexibility to experiment with different styles and techniques. Whether I’m making a delicate cherry blossom or a bold sunflower, I know I can count on these felts to bring my vision to life.
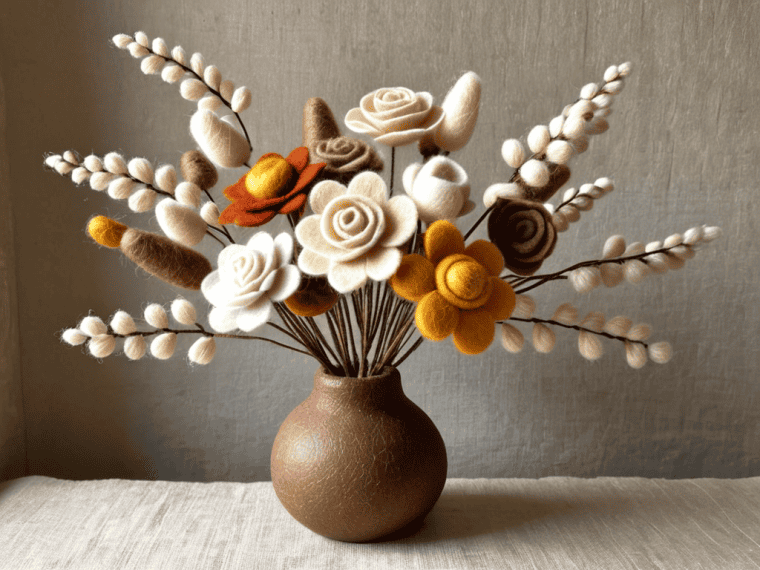
Handmade Felt Accessories Unleashed
Now that we’ve delved into the world of felt flower making, it’s time to take our creations to the next level by incorporating them into handmade accessories. I love adding these charming blooms to hair clips, brooches, and even shoe embellishments. The possibilities are endless, and it’s amazing how a simple felt flower can elevate an entire outfit. By experimenting with different colors, sizes, and arrangements, we can create one-of-a-kind pieces that reflect our personal style.
From statement pieces to subtle accents, handmade felt accessories offer a unique way to express ourselves through fashion. Whether you’re looking to add a pop of color or a touch of whimsy, felt flowers can be used to create anything from elegant jewelry to playful bag charms. With a little creativity, we can unleash a world of handmade possibilities, making each piece truly special and meaningful.
Blooming Brilliant: 5 Essential Tips for Felt Flower Making
- Petal perfection starts with the right tools – invest in a good pair of scissors and a needle with an eye big enough to thread your embroidery floss
- Choose your felt wisely – the best sheets are made from high-quality wool or a wool-blend that holds its shape and has a soft, velvety texture
- Don’t be afraid to experiment with different colors and textures – mixing and matching can create one-of-a-kind blooms that add an extra touch of personality to your creations
- To achieve a realistic look, pay attention to the way the petals are layered and arranged – a good rule of thumb is to start with the smallest petals at the center and work your way outwards
- Practice makes perfect, so don’t get discouraged if your first few attempts at felt flower making don’t turn out exactly as you envisioned – with time and patience, you’ll develop the skills and techniques needed to craft gorgeous, professional-looking blooms
Key Takeaways from Our Felt Flower Making Journey
I’ve discovered that the simplest felt flowers can bring the most joy, and it’s all about experimenting with different colors and textures to create unique pieces
Choosing the right felt sheets is crucial – look for high-quality, thick felts that can hold their shape and don’t fray easily, making the crafting process so much more enjoyable
Whether you’re making a delicate brooch or a vibrant hair clip, the precision and patience required for felt flower making can be incredibly therapeutic, helping to unleash your creativity and calm your mind
The Therapeutic Bloom
As I weave petals from felt, I’m reminded that creativity is a gentle rebellion against the ordinary, and with each delicate flower, I’m reclaiming a piece of my soul.
Lily Green
Conclusion
As we’ve explored the world of felt flower making, it’s clear that this craft offers a unique combination of therapeutic benefits and creative expression. From the initial steps of preparing your materials to the final touches of assembling your handmade flowers, each stage of the process is an opportunity to relax and tap into your imagination. Whether you’re using high-quality felt sheets or experimenting with different techniques, the journey of creating something beautiful with your own hands is incredibly rewarding.
As you continue on your felt flower making journey, remember that the true magic lies not just in the end result, but in the creative process itself. Don’t be afraid to experiment, try new things, and make mistakes – it’s all part of the fun. With every petal, leaf, and stem you craft, you’re not only bringing a little more beauty into the world, but also cultivating a sense of mindful creativity that can stay with you long after you’ve finished crafting.
Frequently Asked Questions
What types of felt are best suited for creating realistic and durable flowers?
I swear by high-quality wool or wool-blend felts for realistic and durable flowers. They have a lovely texture and subtle sheen that mimics real petals. Look for felts with a high wool content, like 80% or more, for the best results.
Can I use felt flowers to decorate outdoor items, or will they deteriorate quickly?
I just adore using felt flowers to decorate outdoor items, but I do take precautions. While they can deteriorate quickly if exposed to harsh weather, you can still make them work with a little creativity. I recommend adding a waterproof sealant or using them in covered areas to keep them looking fresh and fabulous.
How can I add dimension and texture to my felt flowers to make them more lifelike?
To add dimension and texture, I love experimenting with layering, ruffling, and shaping my felt petals. You can also try adding some subtle shading with fabric paint or markers, and even incorporate different materials like stamens, leaves, or beads to give your flowers a more organic feel.